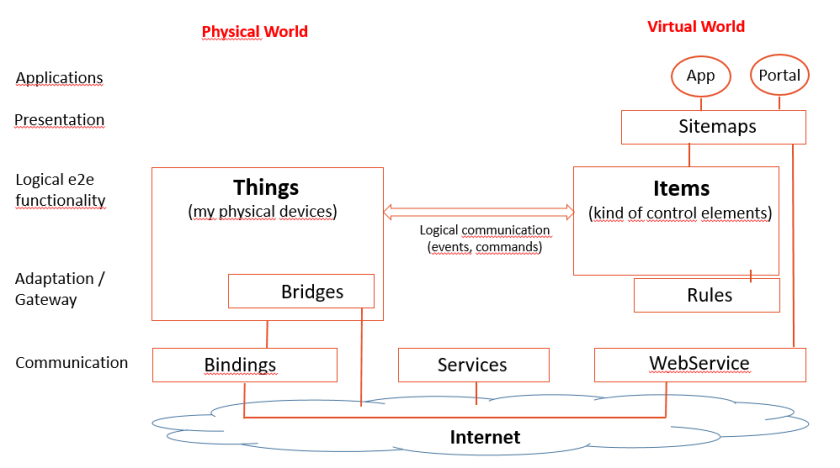
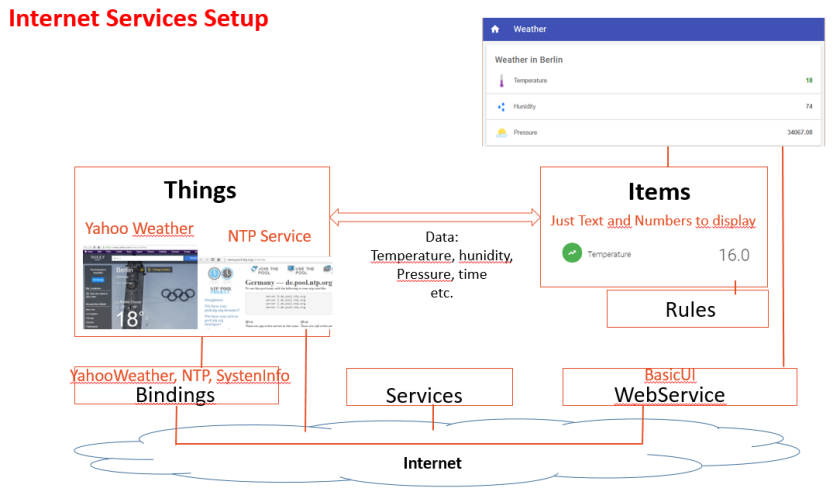
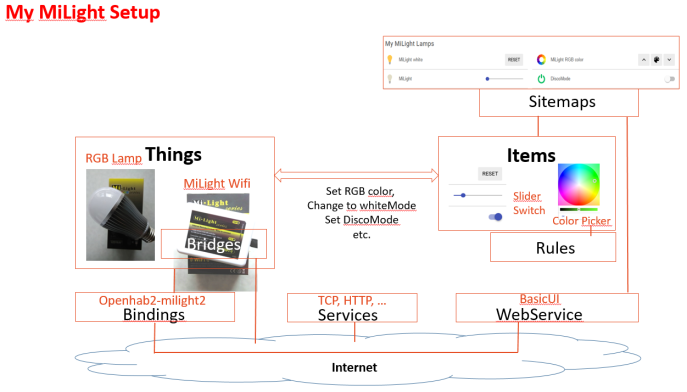
In previous blog Starting with openHAB2 we introduced the term “Things” – either as a physical device (rollershade, sensor, etc.) or as managable source of information, e.g. internet services or internal services. In most cases these services are used to display some interesting values, e.g. outside temperature from weather service or CPU usage from internal service. In this blog we will handle 3 examples: Yahoo Weather, NTP and Systems Service and learn how to present the data.
Yahoo Weather
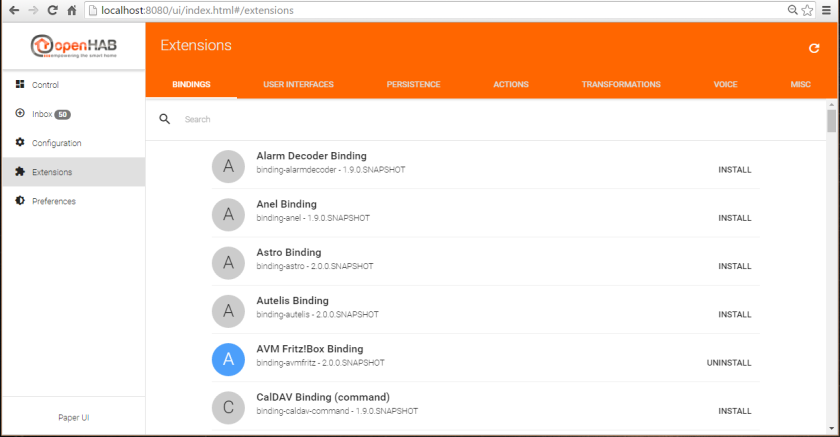
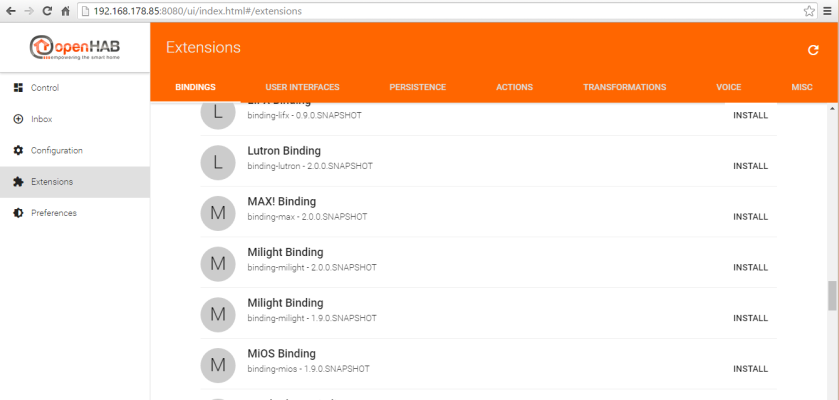
At first we ihave nstall the YahooWeather Binding via PaperUI:
PaperUI -> Extensions -> Bindings -> Yahoo Weather Binding -> Install
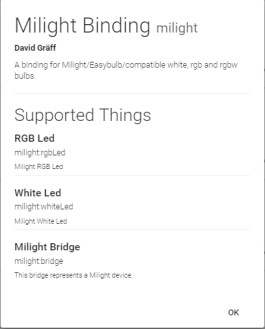
Installation of Bindings was already described in Setup for Mi-Light based on PaperUI.
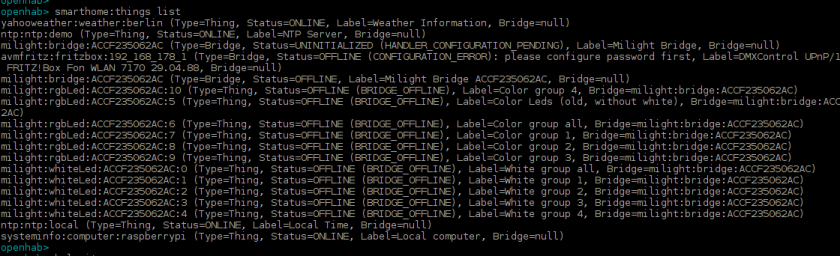
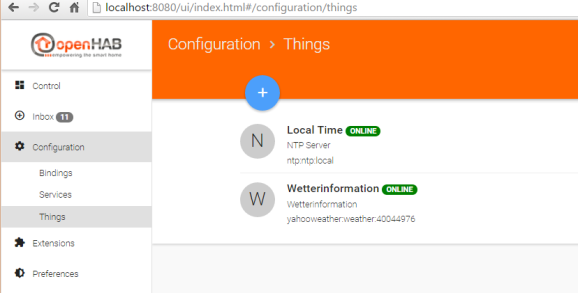
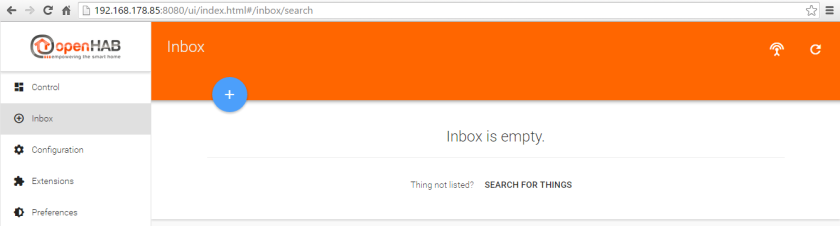
Check the PaperUI->Inbox or PaperUI-Configuration->Things. By using the Discovery Service the Thing “weather Information” should be automaticallly detected.
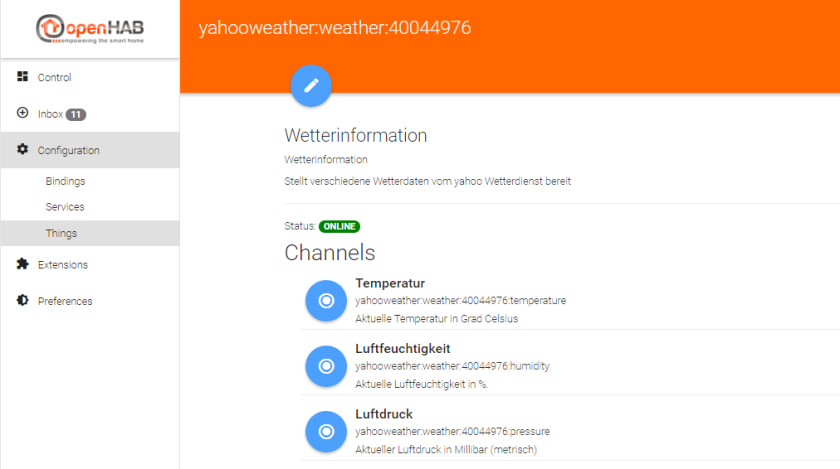
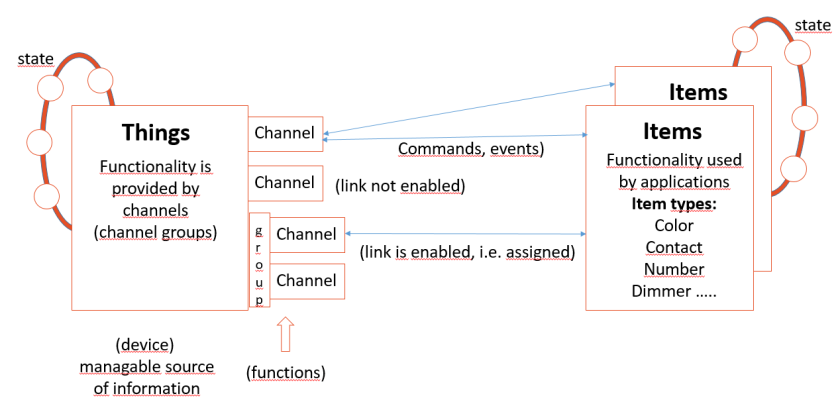
There are three channels for temperature, hunidity and pressure. Now we have to configure the thing for your dedicated location, press the blue edit button:
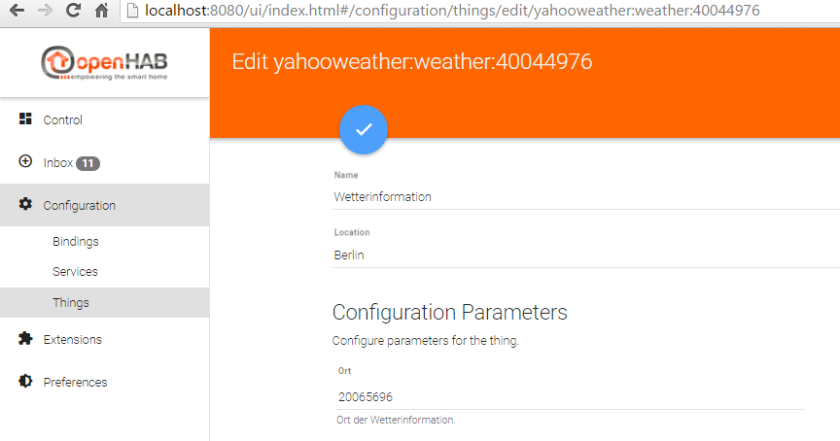
At “location” you can insert the name of your town. There is another mysterious number in the “Configuration Parameters” part. This this the identification of your area (socalled WOEID). You can get this number from here. For my Berlin area I have to insert 20065696.
You should also fix this information in <conf>/things folder. I created a new file named “YahooWeather.things” with following content (the second NTP entry is for next example):
yahooweather:weather:berlin [ location="20065696" ]

ntp:ntp:demo [ ntpServer="de.pool.ntp.org", refreshInterval=60, refreshNtp=30 ]
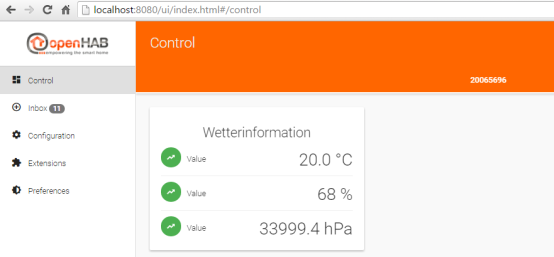
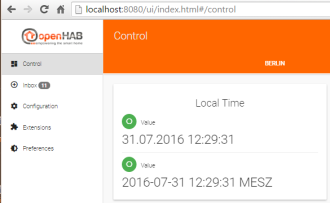
A first view is already available in PaperUI -> Controls:
But we want to have our individual view. Therefore we create an items file YahooWeather.items in <conf>/items with following code:
Number Temperature "Temperature [%.1f] °C" { channel="yahooweather:weather:40044976:temperature" }
Number Humidity "Hunidity [%.1f]" { channel="yahooweather:weather:40044976:humidity" }
Number Pressure "Pressure [%.1f]" { channel="yahooweather:weather:40044976:pressure" }
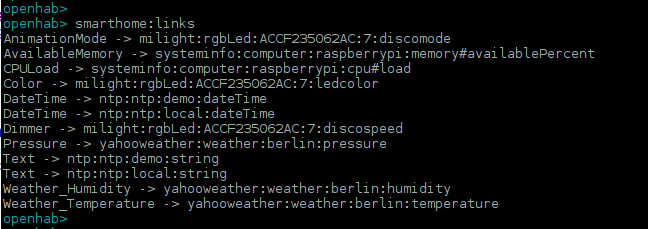
We introduced three numbers containing the values of temperature, humidity and pressure. All of them have the binding/channel information which you can copy from the Things view in PaperUI. Finally, there is some display information – the text and formatting information.
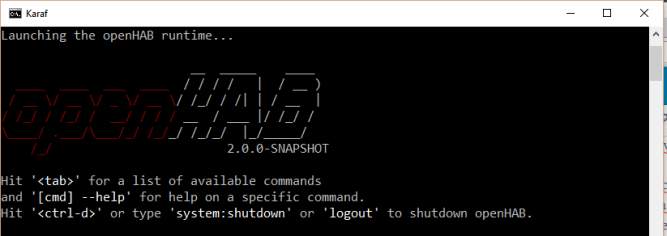
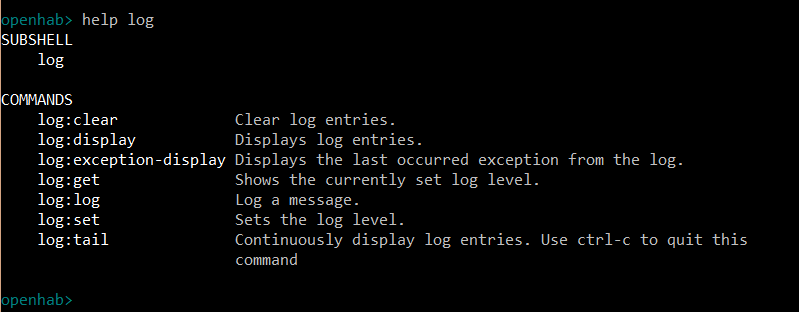
Now we can check if everything ok in Karaf console (see Powerful tools: PaperUI and Karaf):
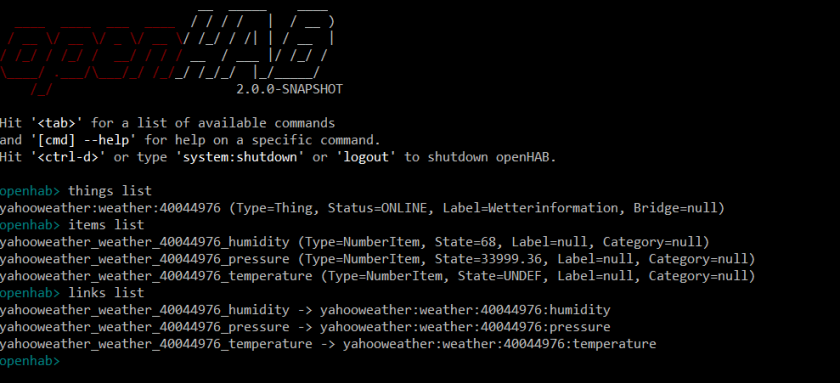
As expected, openHAB2 repository contains 1 thing, 3 items and 3 channels.
Finally, we define our individual presentation information. This happens in an sitemap file in <conf>/sitemaps (we call the file YahooWeather.sitemap and the sitemap itself YahooWeather, too):
sitemap YahooWeather label="Weather"
{
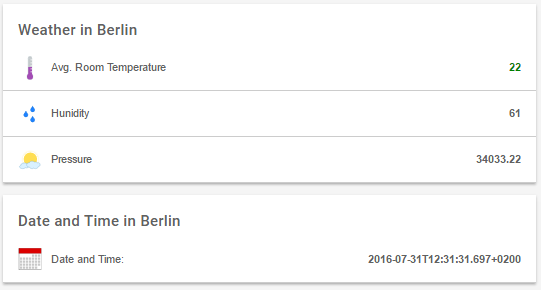
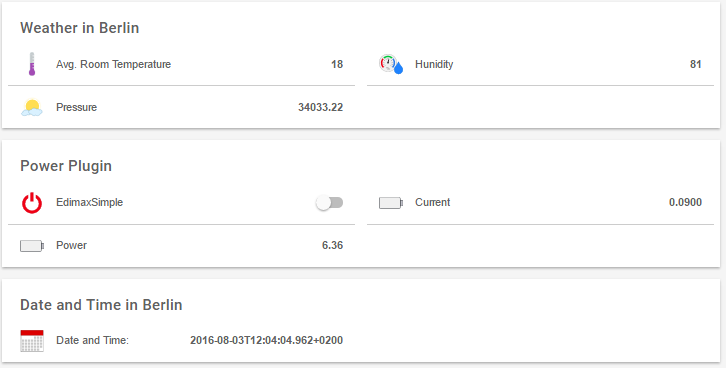
Frame label= "Weather in Berlin" {
Text item=Temperature icon="temperature" valuecolor=[>25="red",>15="green",>5="orange",<5="blue"]
Text item=Humidity icon="rain"
Text item=Pressure icon="sun_clouds"
}
}
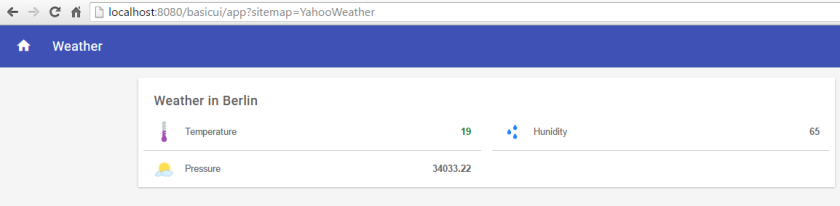
We defined one frame (that is a block in presentation view in order to show our known three values as text information in a group). As a gimmick I introduced a special icon for each item. A complete list of predefined icons can be found here. Furthermore, the temperature value is shown in certain colors that dependend on the current value. here is the result:
Hints: Sometime i takes a while until the values are catched and displayed. If you have at first a screen without current values – be patient!
Links:
NTP – Time information
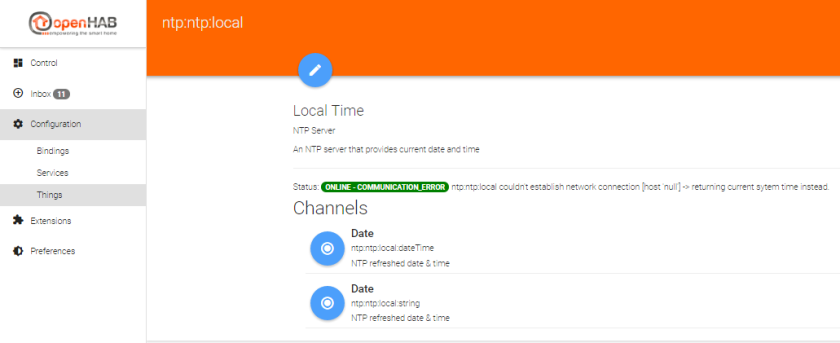
Now let’s extend our example by NTP time information. After installing the NTP binding you will see some time later the “Local Time” thing in the Inbox. Press on the blue hook button to take it over (“Add as a thing”). Now we have two things in our list Configuration -> Things:
If there is no connection to NTP server, the binding takes the local computer time.
Items:
DateTime DateT "Date and Time: [%1$tA, %1$td.%1$tm.%1$tY %1$tT]" { channel="ntp:ntp:local:dateTime" }
Something is still wrong, either my network connection (firewall etc.) or … its a beta:
Now, it works:
<to be completed>
System Info
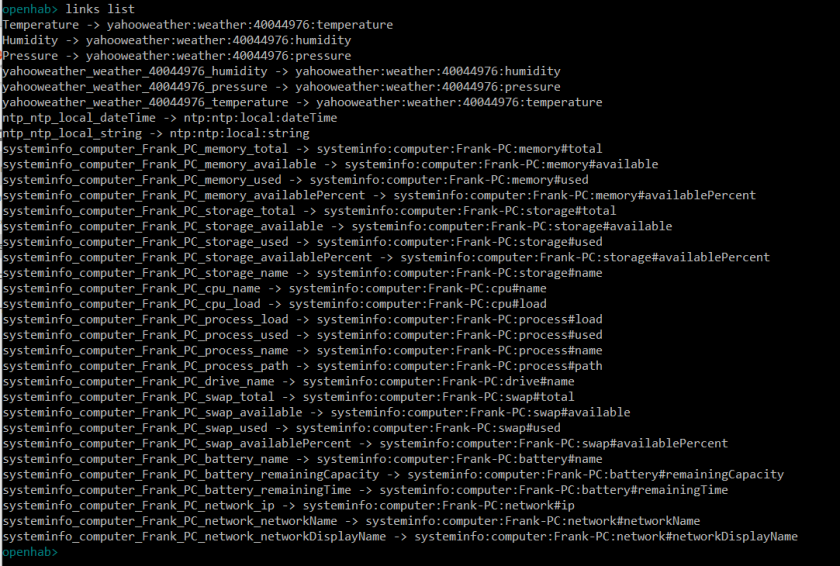
Last, but not least we install PaperUI -> Extensions -> System Info Binding. This service provides us internal computer information about memory, CPU, processes, network etc., see Karaf console (systeminfo links):
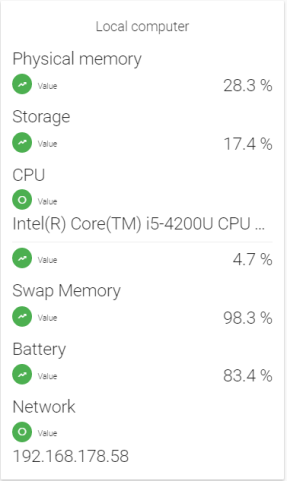
Again, it takes a while until the PaperUI Control panel shows helpful values…
<to be completed>
 you wil get an “Add widget” Button which currently allows you to add following widgets:
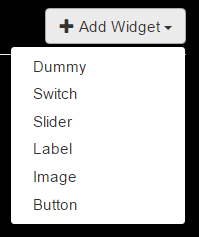
 where you should define your widget, in case of switch gadget:
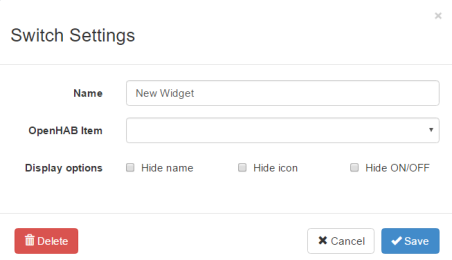
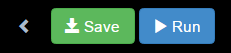 and you will admire the result:
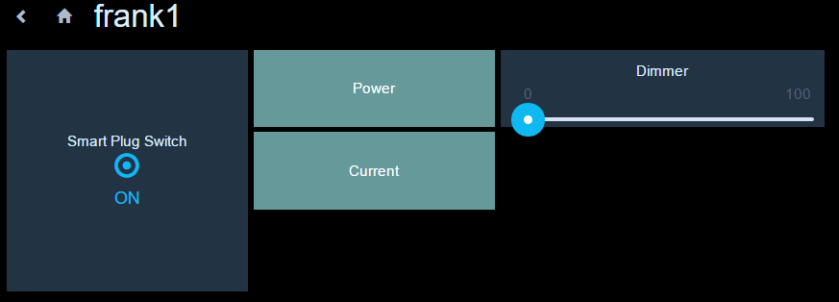


 and become euphoric!